Scroll Top
19th Ave New York, NY 95822, USA
5442

ESS3: Earth and Human Activity

The activity below draws from the content in the page Designs Solutions for Hazards.

Phenomenon:

Large storms bring destructive winds, rain, and storm surge.

Inquiry:

What materials or building designs help a house survive a storm? How can homes be built, or modified, to keep people dry and safe during strong storms?


Guiding Questions:

  1. How can we build our homes to withstand hurricanes?
  2. What elements are important to consider when preparing for natural hazards?

Activity:

Build a cardboard house and engineer storm-resistant features.

Watch:

A demonstration of this activity on a NOAA Live! Webinar (recorded Feb 3, 2021).

Materials:

  • Student worksheet and teacher answer guide (attached below):

Part A: Build a House:

  • thin cardboard (cereal and cracker boxes work well, and using the part over the fold is fine)
  • scissors
  • pen or pencil
  • cardboard house template or ruler

Part B: Testing Storm-Resistance
Storm-simulating materials:

  • fan
  • large tray
  • water
  • measuring cup
  • water pouring device
  • sponge (without scour pad; normal size cut in half works well)
  • measuring cup or graduated cylinder (or other liquid measuring device)

House designing materials:

  • attaching material (e.g., play-dough, string, paper clips, glue, hot-glue, tape)
  • waterproof material (e.g., plant leaves, foil, paint, waxed paper)
  • lifting material (e.g., play-dough, blocks, chopsticks, small rocks)
Teacher Recommendations:

  • Review the building materials used in The Three Little Pigs story and discuss how each type of material was affected by wind.
  • Look at different types of houses (in real life, in books, or on the computer), and discuss the benefits of designs to specific locations and to storm resistance.
  • Encourage students to use natural (or scrap) materials and to bring in materials from home (Fig. 4).
  • For each test, place a sponge that has been wetted and squeezed dry inside the house. After the test, squeeze the sponge into to graduated cylinder to measure the amount of water that entered the home.
  • Compare designs across student groups to look for evidence of common solutions.
  • The activity Modeling a Hurricane will help students connect the relationship between wind strength, waves, water action, and the need to design storm-resistant structures (see Activity Questions).
  • Explore this activity about designing homes to resist erosion: Help Batman Build a Safe and Stable House by Masters et al., 2018.


Procedure:

Build Your House

  1. Build a simple house using only cardboard, scissors, a ruler, and the house template. (One house per group of 2-4 works well.)

Wind Simulations

  1. Test your cardboard house in high wind conditions (using a fan) (Video 1).

Video 1. Wind at speed 1 (lowest) tested on a house without modification.

  1. Experiment with turning your house so that different sides face the fan (Video 2).
    1. Is there a difference? Describe.

Video 2. Wind speed 1 (lowest) tested on a house without modification facing an alternate direction.

  1. Write down observations about what happens to your house.
  2. Think of modifications and write a hypothesis about how they will help your house survive in strong winds.
    1. Modify your house (Fig. 1).
      Fig. 1. Cardboard house made using the provided template and reinforced with playdough 'tie-downs' for added strength and wind protection.

      Fig. 1. Cardboard house made using the provided template and reinforced with play-dough ‘tie-downs’ for added strength and wind protection. (Image courtesy of Kanesa Duncan Seraphin.).

    2. Test your modified house against the high winds.
      1. Use the most destructive placement of your house (from step 2a).
      2. Use the same fan, and start at low speed.
        1. Increase the fan speed to test your design modification at higher wind speeds.
    3. Observe and describe what happens.
      Video 3. Wind speed 4 (strongest) tested on a house (in same position as video 1) with a reinforced roof.

Flood and Rain Simulations

Fig. 2. 1/2 a dry household sponge placed in house to collect rain and flood water.

Fig. 2. 1/2 a dry household sponge placed in house to collect rain and flood water. (Image courtesy of Karen Duncan.).

  1. Rain on your house!
    1. Place your house in a bucket or other water-catching device.
    2. Remove the roof and place a dry sponge inside (Fig 3). Replace the roof.
    3. Make it Rain! Use the measuring cup to slowly pour 2-3 cups of water over the house (Video 4). You may have to experiment with how much water to use, but the same amount should be used in each rain trial so that you can compare.
      1. What happens to the roof?
        Video 4. Rain pouring down the roof of a model house without modification.
      2. What happens to the bottom of the house?
        Video 5. Effect of flood water on the model house.
      3. Can you tell if more water is coming in through the roof or the bottom?
        Fig. 3. Sponge water squeezed into graduated cylinder (about 30ml).

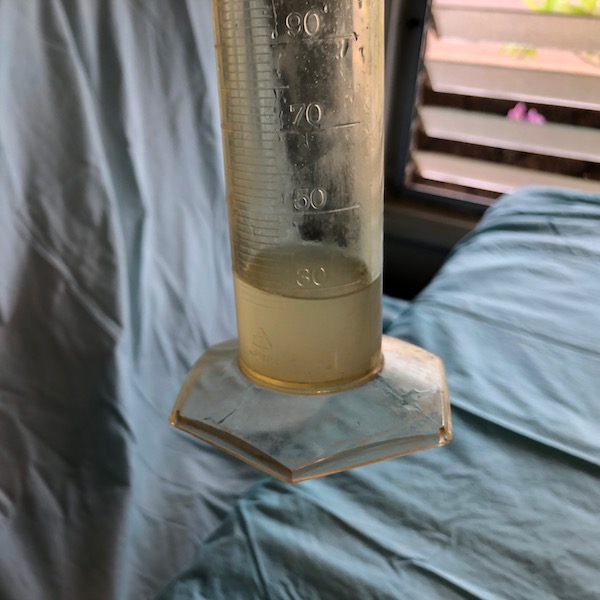
        Fig. 3. Sponge water squeezed into graduated cylinder (about 30ml). (Image courtesy of Karen Duncan.).

        1. How could you test your hypothesis?
      4. Remove the sponge from the house and squeeze the water into the graduated cylinder (Fig 4). Measure the amount of water.
  2. Engineer modifications to make your house more water resistant. Remember that water can reach your house from above and below.
    1. Think of modifications and write a hypothesis about how they will help your house survive in strong rain and floods.
    2. Modify your house.
    3. Test your modified house again against rain and flooding. Observe what happens and then write a statement to claim how your engineering design:
      Fig. 4. Student cardboard house retrofitted with plant leaves for water-resistance, and playdough stilts to withstand flooding.

      Fig. 4. Student cardboard house retrofitted with plant leaves for water-resistance, and play-dough stilts to withstand flooding. (Image courtesy of Kanesa Duncan Seraphin.).

      1. did (or did not) help the house stay dry in strong rain.
      2. did (or did not) help the house stay dry when the ground was flooded.

Activity Questions:

  1. Which material or design that worked best to protect your cardboard house against the followng. For each claim, provide evidence and write out your reasoning.
    1. Wind?
    2. Rain?
    3. Flooding?
  2. In this activity, the rain came straight down and the flood water was not moving. However, during a storm, water can move quickly with a lot of force. How do you think fast moving water would affect your house differently?
  3. During tsunamis, a lot of damage can be caused by large objects moving with rushing water. How can we help protect buildings from things like telephone poles and shipping containers washing around in the water?
  4. During hurricanes, many people cover their windows with hard material, like plywood. How does this help protect their home?
  5. Describe the area where you live and the types of threats to the home you live in.
    1. For example, do you live near the ocean, near a stream, or somewhere very windy or rainy?
  6. Did native people in your area engineer homes to survive severe storms? What do you think, and what is your evidence?
  7. What types of engineering modifications might help make the home you live in more storm-proof?
5437

ESS3: Earth and Human Activity

The activity below draws from the content in the page Marine Debris.

Phenomenon:

Plastic products, like straws and bags, are polluting the environment as marine debris (Fig. 1).


Inquiry:

How can beeswax wraps be used to replace plastic bags in your home, snacks, and lunches (Fig. 2 and 3)?


Guiding Questions: 

  1. What is the problem with single use plastics?
  2. How can we reduce our plastic use?

Activity:

Design and create your own beeswax wraps to develop alternatives to single use plastics.


Materials

  • Teacher Recommendations (attached below)
  • Student Worksheet and Teacher Answer guide (attached below):

Part A. Color Your Cloth:

  • Pre-washed cotton material piece, approximately 11 inches square
  • Manila folder (or other type of thick paper)
  • Painter tape or masking tape
  • Fabric markers
  • Stencils (optional, Fig. 4)
  • Pinking shears (zig-zag scissors, Fig. 5)


Part B: Infuse Your Cloth with Beeswax:

  • Parchment paper
  • Beeswax beads or pellets
  • Iron
  • Ironing board

Part C: Engineer Use for Beeswax Wraps

  • Water
  • Cloth that has no beeswax added (same type of cloth used in Part A)
  • Snack items, for example:
    Carrot sticks, apple slices, muffins. crackers, pretzels, or nuts
  • Watery items in bowls, for example:
    yogurt, apple sauce, or poi
  • Rubber bands
  • String

Teacher Notes and Recommendations:

  • This activity was inspired by Meli Wraps, which the authors have used to successfully reduce their own plastic use: https://meli-wraps.myshopify.com
  • These wraps are made only of cotton cloth and beeswax. They will not be sticky like commercial beeswax wraps, which also contain tree rosin and plant oil. These beeswax-only wraps will also acquire folds and creases over time. Additionally, they may develop areas of “low wax”. You can add wax and re-iron to refresh the wraps at any time.
  • Beeswax is considered edible because it is non-toxic. However, humans cannot digest it very well, so it does not have high nutritonal value. The formation of wax by bees is really interesting (and involves drying out the nectar to reduce its water content), and the use of beeswax by humans has a long history (including many modern applications, such as cosmetics).
  • This lesson is a great opportunity to teach students about the Ocean Literacy Principles. Have them draw and/or record each of the principles. Drawing images, words or phrases that are meaningful and connect to students personally will help them to engage with and remember the Ocean Literacy Principles
  • Helpful additional classroom material:

  • Notes on materials:
    • The heated iron sets the colors, so you don’t need to wash before ironing.
    • Fabric markers are better, as the permanent markers run when ironed with the beeswax, even if you put it through the washer and dryer first.
    • Use about 1/3 cup per 11 inch square piece of fabric.
    • Grated beeswax (from a block) can also be used, but pellets are generally the same cost and donʻt require the extra prep time of grating.
    • You can cut the fabric in any shape or size depending on desired uses.
    • It is better to have too much wax than not enough. If there is not enough wax, liquids will pass through the cloth. If there is too much wax (i.e., globs of wax), you can use an extra cloth to soak up some excess wax. Lay the next cloth on top, replace the parchment paper, and iron gently until the original cloth has a nice amount of wax.

Procedure:

  1. Wash and dry fabric
  2. Use pinking shears to cut pieces from cotton material for each student

Part A. Color your cloth


  1. Use tape to secure your piece of cloth to the manila folder (Fig. 6).
    1. Tape close to the edge so you will be able to color the maximum area of your cloth.
    2. Use small pieces of tape rather than taping the entire edge.
  2. Use markers and stencils to color and personalize your fabric.
  3. Remove the tape.
    1. Pull tape from the middle of the cloth toward the outside to prevent fraying.
  4. Check the edges of your cloth to see if any areas need to be re-trimmed.
    1. Use the pinking shears to re-trim frayed areas of your cloth as needed.

Part B. Infuse your cloth with beeswax (with help from your teacher!):

  1. Tape one piece of parchment paper to the ironing board.
  2. Place your cloth on the parchment paper.
  3. Sprinkle beeswax pellets on the cloth (Fig. 7).


  1. Cover your cloth and beeswax with a second piece of parchment paper.
  2. Iron (on the cotton setting) gently over the top of the parchment paper (Fig. 8). Make sure that wax is melted into all areas of your cloth!
  1. Remove the parchment paper.
  2. Wait a few moments for the cloth to cool enough to touch.
  3. Gently remove the cloth, and hang your cloth to finish cooling (Fig. 9).


Part C. Engineer methods for using your beeswax wrap to transport and preserve snacks

  1. Determine if water will pass through a piece of cloth that does not have beeswax added.
  2. Determine if water will pass through your piece of cloth that has beeswax added.
  3. Experiment with methods to use your wrap to pack free-roaming snacks, like carrots or crackers.
    1. Try making an envelope.
    2. Try using heat from your hand to shape and secure your wrap in various positions and with various foods.
  4. Use your wrap to secure a wet snack in a bowl.
    1. Use rubber bands, string, or other materials to secure the wrap as needed.
    2. Test the ability of your wrap to keep the liquid snack in the bowl.
  5. Use soap and water to gently wash your wrap. Dry it with a towel.


Activity Questions


  1. How did adding beeswax to the cotton change the way the material interacted with water?
  2. How would having too little beeswax affect your wrap?
  3. Why did the wrap stiffen as it cooled?
  4. How did heating the wrap help you to make useful shapes (Fig. 10)?
  5. What do you think might happen to your wrap if you wash it with extremely hot water?
  6. Over time your wrap may crease or lose wax. How do you think you will be able to fix this?
  7. What types of snacks or foods would not be well suited to the beeswax wrap?
  8. What physical properties would help to make your wrap work better?
  9. How will using your wrap to pack snacks help to reduce marine debris?
  10. How does your use of a beeswax wrap relate to Ocean Literacy Principle #6—that the ocean and humans are inextricably connected?
  11. What other uses can you think of for beeswax wraps?

Further Investigations:

  1. Investigate the effect of various temperature treatments on your beeswax wraps (hint: consider cutting a finished wrap into smaller squares and use these to replicate temperature treatments).
  2. Investigate the materials used to make commercially available wraps. How do the materials work together to create these wraps? What are the advantages to these types of wraps? What are the disadvantages of the commercial wraps?\
  3. Investigate the properties of beeswax:
    1. What is its melting point?
    2. What is its Boiling point?
    3. What is its Freezing point?
  4. How does beeswax breakdown in the environment? How does this make it different than plastic?
  5. Investigate the history of human use of beeswax.
  6. Investigate the production and use of beeswax by bees and other animals.
  7. Bonus Feature: Interactive Marine Debris Game!

Follow the prompts in the interactive game below to learn about marine debris.

You may need to enable Flash, refresh, or change browsers to view the interactive feature below.


Note: If you cannot view the entire interactive on your screen, press Ctrl-Minus (-) on a PC and Command-Option-Minus (-) on a Mac to zoom out.


5436

ESS3: Earth and Human Activity

The activity below draws from the content in the page Food Resources and Fisheries Science.

Phenomnenon:

Fish populations can continue to be productive food sources even with fishing pressure.


Inquiry:

How do scientists, fishers, and resource managers learn about fish populations? How can we maintain fish populations for future generations?


Guiding Questions:

  1. How do scientists estimate fish populations?
  2. What is one way fishers ensure stable fish populations?

Activity:

Create a mark-recapture model to investigate how scientists monitor the size and number of a fish population and investigate how selective nets may help maintain sustainable populations.


Materials:

  • Student and Teacher Worksheets (attachment below)
     
  • Lunch size brown paper bags
  • Paper plates​ or paper bowls
  • 3 oz. paper cup

Part A: Mark-Recapture:

  • Original Goldfish
  • Colored Goldfish

Part B: Selective Nets:

  • Cheese-Its

Teacher Recommendations:

  • Suggested distribution of supplies
    • per group – 1/2 to 1 bag original goldfish, 1/3 bag of color goldfish, 1 paper cup, 1 paper bag, 1 paper plate
    • per class – 2-3 boxes of cheeze-its
  • Note: This activity uses The Lincoln-Peterson method of mark-recapture. It is used when the population is closed (no births, deaths, immigration, or emmigration) and every individual has an equal probability of being captured.
    • The population size is estimated by catching animals at time 0 (step 4 in the procedures), marking and releasing them, and then catching animals again time X (at times 1–5, step 7 in the procedures).
    • The number of marked to unmarked animals is then compared to estimate population size.
    • The population size is estimated by N = C x M/R, where M = the number of animals marked at time 0,  C = total number of animals captured at time X, and R = number of marked animals recaptured at time X. 
    • This formula is slightly biased for small populations and can be improved to be less biased with the formula N = M(C+1) / R+1. 
    • For more accurate population estimates, researchers often use more complicated designs where they tag animals at multiple time points and use more advanced equations to estimate population size.
    • In this activity, students will only mark fish at time 0, but they will take multiple samples (at time 1 through time 5) to look for recaptures. They will then average their population estimates.

Procedure: 

Part A. Mark-Recapture Methods

  1. Follow your worksheet to build your model and explore mark-recapture methods. 
  2. Place Original Goldfish (species of interest) in the paper bag (ocean) or small bowl.
  3. How many fish do you think are in your population?
  4. Capture a sample of goldfish from the brown bag (one cup full), and place them on the paper plate to count. Record this number of fish captured on your data table (represented as M). 
  5. Tag these captured fish by replacing each one with a colored fish (the colored fish represent marked individuals). Note: Since we are tagging by replacement, the goldfish that are tagged and replaced by colored fish can no longer count as part of the population. The replaced fish MUST be disregarded or eaten! 

  6. Put the colored (marked) fish back into the bag and shake it (or stir the fish in the bowl) to distribute them. 

  7. Recapture another sample from the bag using the cup and pour onto the plate. 

  8. Record the number of color and non-colorfish in the appropriate columns. Return the entire sample to the bag. 

  9. Shake the bag to distrubute them.
  10. Repeat steps 7-9 two or more times. (The number of 1st Capture remains constant for all samples).
  11. This Population Proportion allows you to estimate the total fish in the population (N) for each sampling. Fill in the column on your data table (N = C x M/R).

N (Total Fish in Population)       =   .       C (Fish Captured in Sample)        

M (Total Marked Fish)                     R (Marked Fish Recaptured in Sample)

  1. Calculate the average of your population estimations (average of N).
  2. Finally, count the actual number of fish in your population (total, marked included!).
Original number of fish marked (M): ________________________
Sample Time #

Number of fish

Captured in Sample

(C)

Number of fish

Recaptured in Sample

(R)

Write out the

Population Calculation

(N = C M/R)


Estimated

Population

(N)

1        
2        
3        
4        
5        
Count of total in actual population: _______________________


Part B. Selective Nets

  1. Replace one-fourth of the gold fish with Cheese-Its. The goldfish are now the juvenile fish and the Cheese-Its are the larger, more mature fish (or larger species not intended to be caught).
  2. Gently shake the bag (or stir the contents of the bowl) to insure randomness.
  3. Cut two dime sized holes in the bottom of the paper cup (net). The holes should be large enough to enable the smaller fish to slip through but not so large as to allow the larger fish to escape. 

  4. Capture a sample of fish from the bag (ocean) using the net (cup). Shake gently to allow the smaller fish to slip through.
  5. Repeat as needed.

Activity Questions:

  1. How do your population estimates (N) compare to the actual population count?
  2. What may account for differences between your count and the actual population? 

  3. In step #13, you counted all of the fish in the bowl. How does this compare to real life (Hint: could you count all the fish in real life)?
  4. How might calculations of population size help scientists and fish regulators determine fish regulations and fish catch limits?
  5. How do selective nets work?
  6. Can a specialized net be successful in releasing smaller juvenile fish?
  7. What are factors that may prevent the smaller fish from escaping?
  8. How might a device such as a specialized net be improved? 

  9. Why is it important to use specialized nets?
  10. Why is it important to sustain fish populations in terms of food chains and food webs?

Further Investigations:

  1. Investigate and discuss the L50 Measurement Ruler!

L50 Background:

In order to maintain a population of fish at sustainable levels, there needs to be enough fish that are sufficiently mature to reproduce and replenish what is being caught. Scientists and fish regulators have identified the length of various fish species at which half (50%) may have been able to spawn and maintain sustainable fish populations. This is called an L50 Measurement Guide (Activity Ruler). One of the ways fishermen (such as yourselves) can directly impact the conservation of living resources and sustain healthy fish populations by learning and implementing the L50 Measurement Guide.


6170

ESS3: Earth and Human Activity

Logo Pacific American Foundation This activity is an excerpt from the Aloha ʻĀina curriculum created by the Pacific American Foundation in cooperation with the Hawai‘i State Department of Education.


Phenomenon:

Wetlands help prevent flooding.

Inquiry:

How do wetlands protect the land and sea?

Activity:

Students help to create a model to simulate the role of wetlands. They predict what will happen to the environment when “wetland areas” are removed from the model, and use the model to test their hypothesis.

Aloha ʻĀina Activity: Wondering About Wetlands


About the Aloha ʻĀina Curriculum


“Shaping the future, while preserving a heritage, the Aloha ‘Āina Curriculum provides Hawai‘i’s youth with culturally relevant lessons. Since 2005 the Pacific American Foundation and its curriculum writing team has developed a collection of unit and lessons plans that explore, reveal and explain the ahupua‘a land-management system and challenges students to become stewards and scientists who care for the land and preserve the traditions. ‘Āina, that which nourishes, encompasses land, ocean, heavens, land-based water systems, plants and animals. Aloha ‘Āina is a way of life that is evident in Hawaiian practices.”