What is LPR, and how do I set it up on the Mac?
LPR (Line Printer Remote) is a platform-independent printing protocol that uses TCP/IP. (This means that the printer must be connected via an Ethernet cable and have an IP address. If you are using an AppleTalk cable to connect a printer, you cannot use LPR. Click here to set up printing with an Apple Talk cable.) It allows authorized users to access any printer through its IP address, currently the most supported industry standard. This not only allows for a migration to a single protocol environment, but it also allows multiple platforms (Macs, PCs, Suns, etc...) to print to the same printer without any extra configurations.
| WARNING: | If you are running Mac OS 8.0, you will be unable to print using LPR. You will need to upgrade to Mac OS 8.1 or higher. Download the upgrade from here. |
| NOTE: | Make sure that the printer that you are using for LPR is assigned a valid IP address before proceeding. If you are not sure, or do not have an IP address, please contact support@soest.hawaii.edu. |
-
Download the required LaserWriter driver. If you are using Mac OS 8.5 or higher, LaserWriter 8.6 is already installed and you can skip to step 4. If you are using Mac OS 7.5.x or 7.6, you must use the LaserWriter 8.5.1 driver. If you are using 7.6.1 or 8.1, we recommend using LW8.6.
|
|
|
|
|
Note: Make sure that you close all other applications before installing the LaserWriter software.
- After
downloading the binhex file, it should automatically be decoded and
placed onto the desktop. For LaserWriter 8.5.1, a folder called
LW_8.5.1 Folder should be created. Double click on the
folder and then on each .img file (start with 6 and go backwards
to 1). Double-click on the Installer icon.
For LW 8.6, double-click the LW 8.6.smi icon. This will run the self-extracting file and the LaserWriter Software folder should appear on the screen. Double click on the folder and then on the Installer icon.
- You should see
a splash screen labeled Apple LaserWriter Software Installer.
Click on Continue... to begin the installation. Agree to
the license. The program will first allow you to select the location
that you would like to install the utility. The default location
is usually adequate, so unless you are an advanced users, don't make
any changes and click on Install.
After the installation is completed you will need to restart your computer. Click on Restart... to reboot your machine.
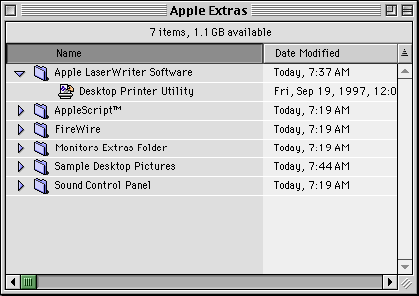
- After your machine
has rebooted, double-click on your hard drive icon and then the Apple
Extras folder and then the Apple LaserWriter Software
folder. (This location is also applicable to users of Mac OS 8.5 and
higher. If you manually selected the install destination, find
the Apple LaserWriter Software folder.) Double-click on Desktop
Printer Utility to run the program.
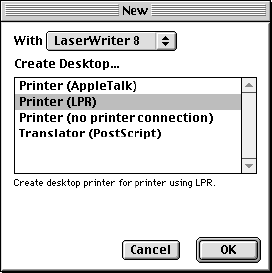
- In the list of
connection types, select Printer (LPR).
- There will be two
box with the Change... option. In the top box (PostScript
Printer Description file), you will need to select the printer file
that corresponds to the printer that you are setting up. If you
don't have the correct printer file, you will need to get it from the
vendor's web site.
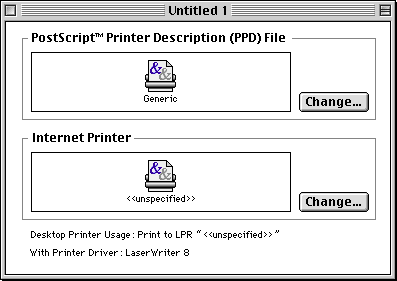
Note: After downloading and extracting the ppd archive, if you still don't see any printer choices or the specific printer you want to use, the location of the ppd files might be incorrect. Please contact RCF for help.
- Next, click on
the lower box (Internet Printer). For the Printer Address,
type in the IP or name of the server that the printer you wish to use
is being shared from. For the Queue, type in the queue
name of the printer.
- Click verify to
assure the connection is made and then click OK
- Close the window
by clicking on the top left box and click on Save. You
will be asked for a location to save the printer icon. Again the
default location is adequate, but you can change it if you like.
Click on Save.
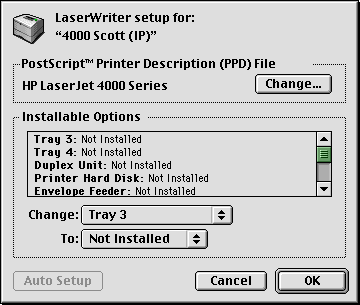
The name entered here is what the Desktop Printer Icon will be named. The Desktop Printer name can also be changed at a later time as with any file or folder. Once the icon is on the Desktop, or wherever it was saved, the printer options will need to be manually configured. This step is essentially the same as choosing Configure after setting up a printer in the Chooser. To set the options highlight the Desktop Printer icon and select Change Setup from the Printing menu.
- Congratulations,
you are now set up for LPR printing!
SUMMARY: Overview of LPR printing:
Line Printer Remote (LPR)/Line Printer Daemon (LPD) printing is a defined protocol for transferring print data information across a network. LPR printing is implemented using the TCP/IP protocol over Ethernet. The main reason to use LPR instead of AppleTalk is if the network administrator is trying to reduce traffic and bandwidth.
NOTE: Use the ASCII format for those HP Jetdirect Print Servers not listed above. A binary file or even an EPS binary file within a document can yield pages of meaningless characters.
The disadvantage of using LPR printing is the LPR/LPD protocol is a send only mechanism. There is no way for the printer to relay status information back to the Macintosh. For instance, if a 250-page print job is sent to an HP LaserJet printer and there are only 100 pages in the printer. When the printer runs out of paper there will not be an error on the Macintosh. The only way a user would know the printer needs more paper would be to look at the LCD display or error lights on the printer.
NOTE: The HP Jetdirect 150X and 170X print servers do not support the LPR/LPD protocol
© Copyright 2002-2003. All rights reserved. School of Ocean & Earth Science & Technology. Research Computing Facility. Updated ( 1/17/03 16:00 )