You will need to know the name or the IP address of the printer you wish to access.
A valid SOEST network connection is required to access printers on the network.
Network printers added to a computer are available to all users, not just the account this is done on.
Please select your operating system below to jump ahead to the appropriate instructions:
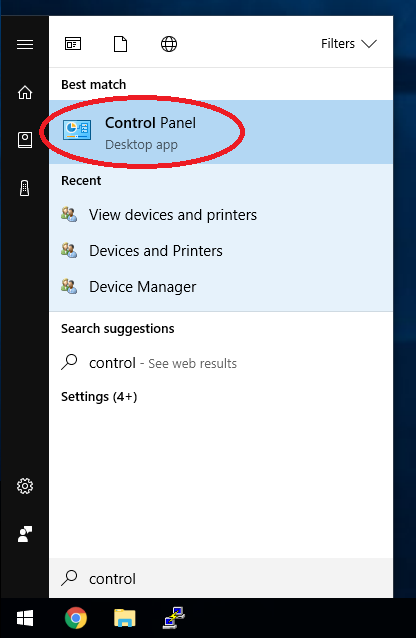
Open the Control Panel. You may do this by opening the Start Menu and typing "Control Panel" into the search bar. Select the option labeled "Control Panel" with the words "Desktop app" below it.
(Note: The search bar in Windows 10 is not visible when the menu is first opened. To access the search bar, just start typing with the Start Menu open.)
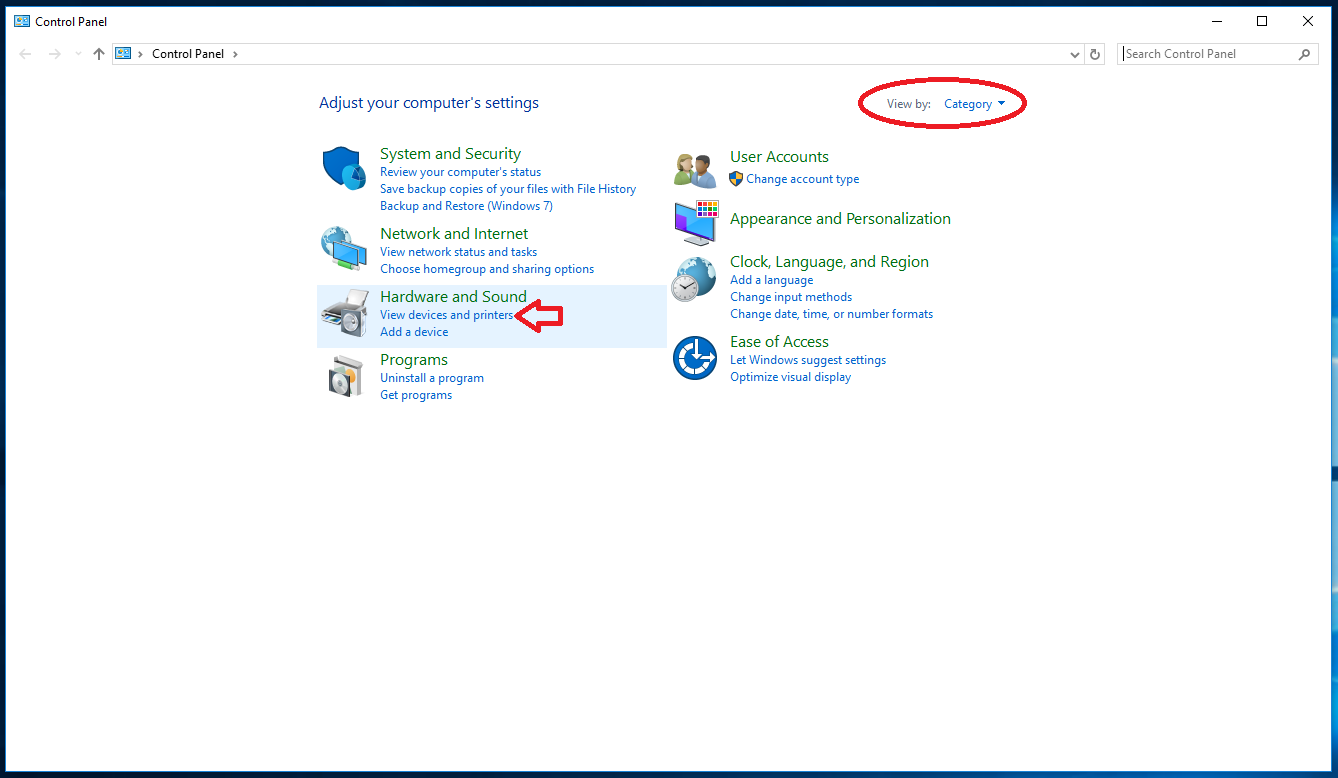
The Control Panel should now be open. Change the layout of the window by setting the "View by:" field in the top right of the window to "Category". Under the "Hardware and Sound" category, click the link for "View devices and printers".
(Note: This step is optional. Removing connections that do not exist or work is good for clarity. If you don't have any printers to remove, skip to Step 2: Use the Add Printer Wizard.)
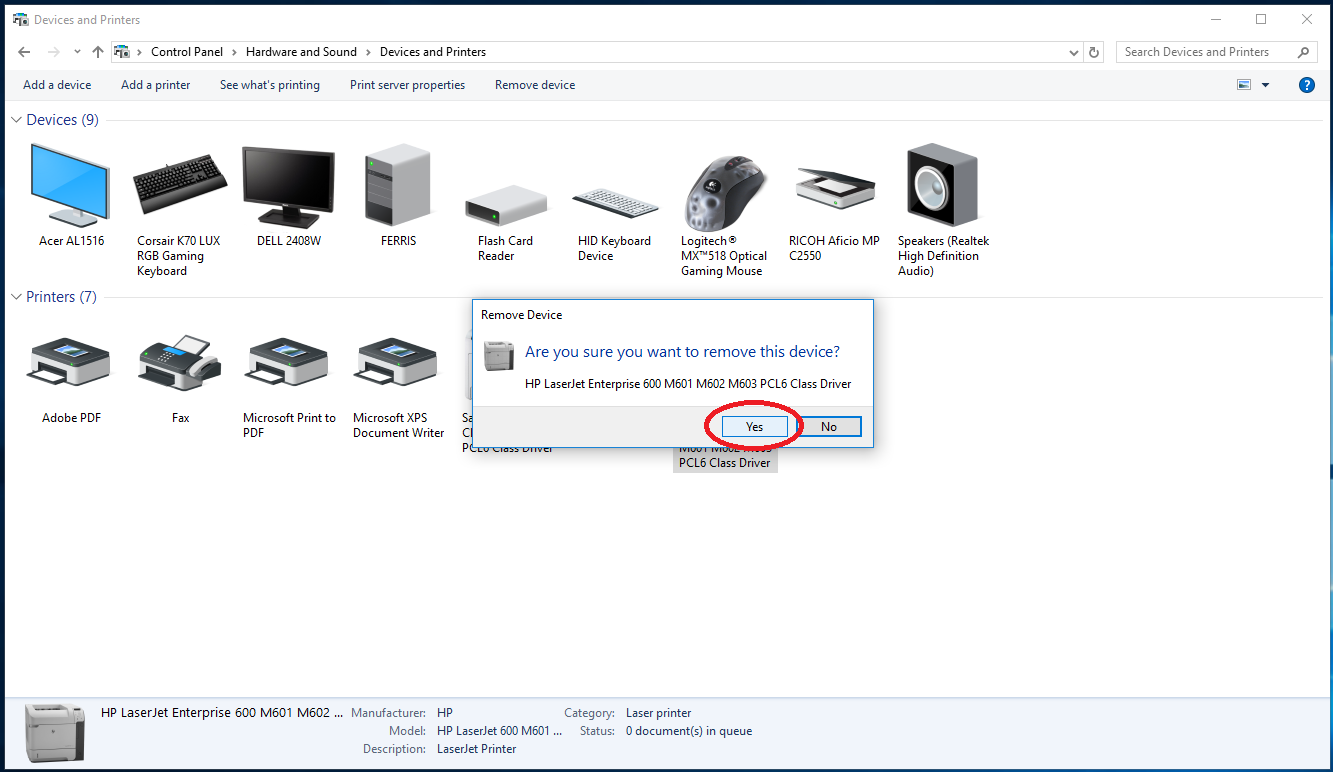
Right click on a printer to be removed. Select "Remove device" from the menu that appears.
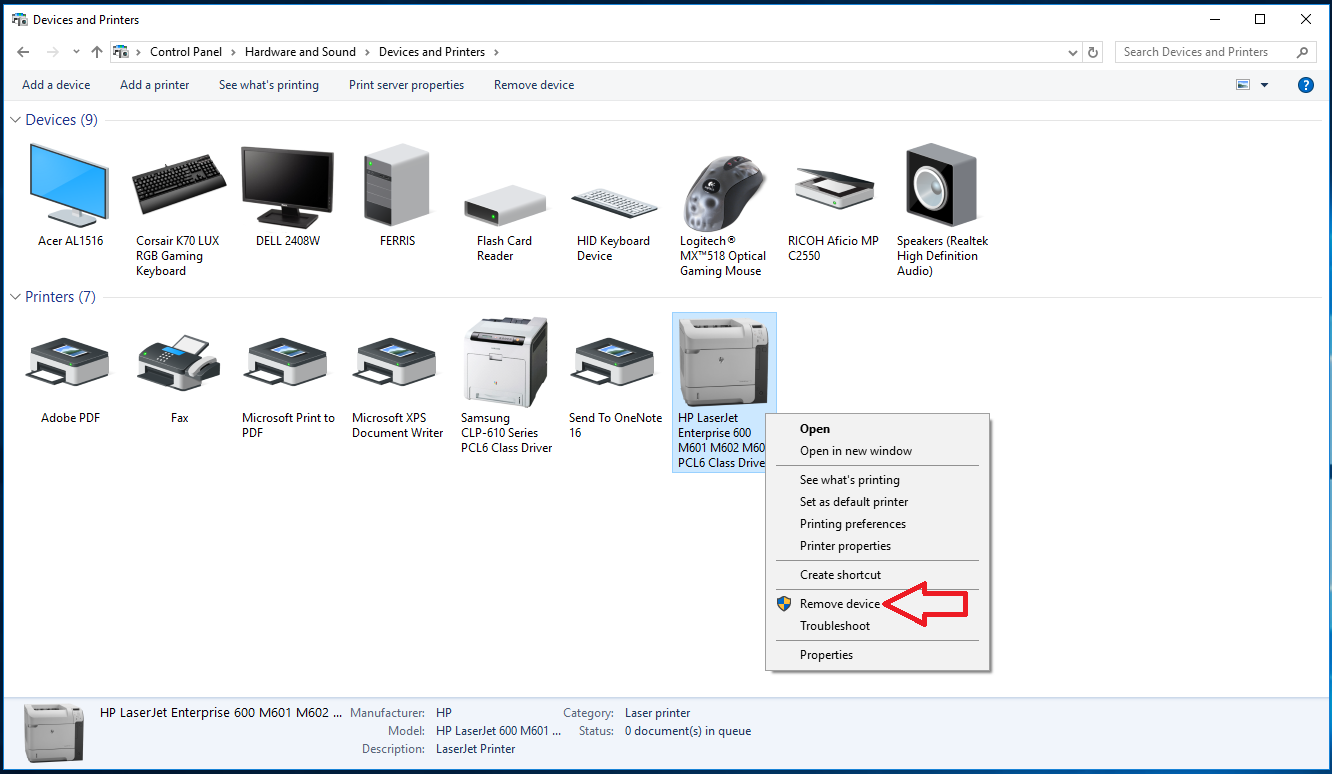
A window will appear asking to confirm your deletion of the device. Confirm that you would like to remove the device by selecting "Yes".
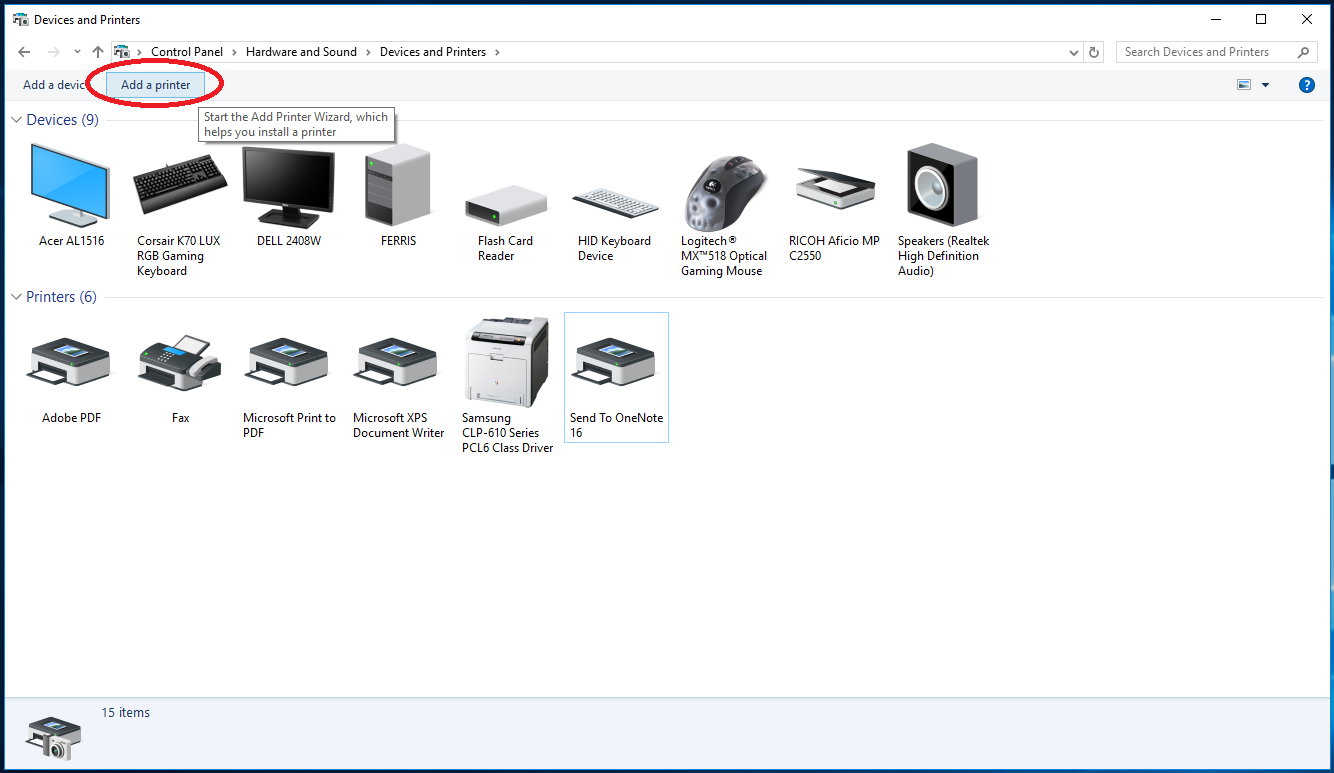
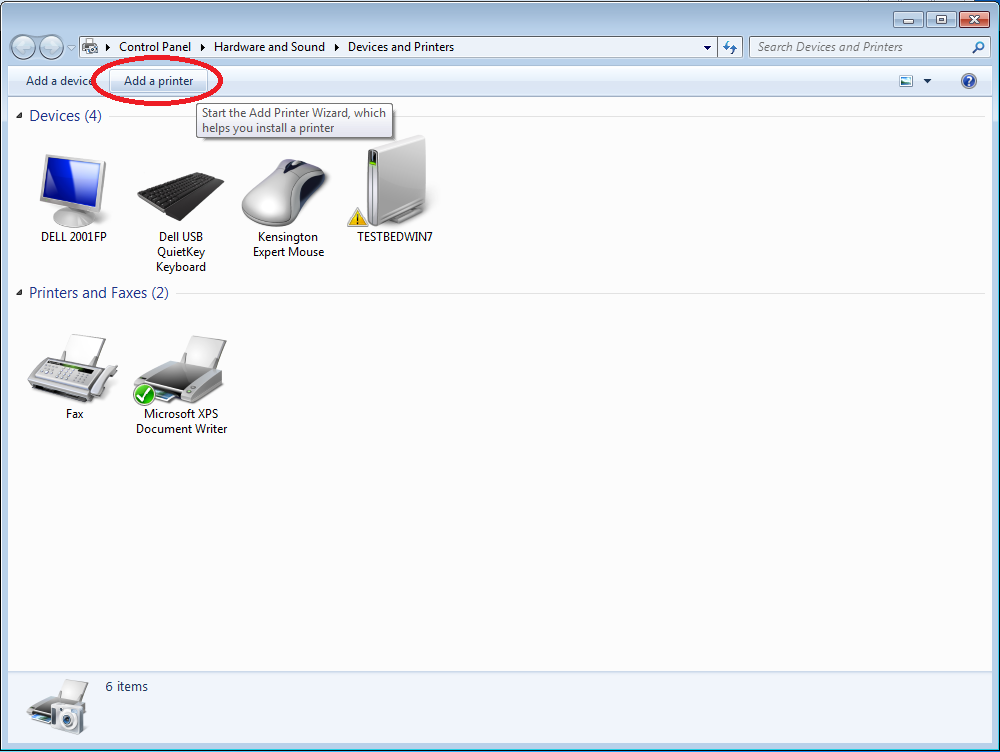
Click the "Add a printer" button in the window's top menu.
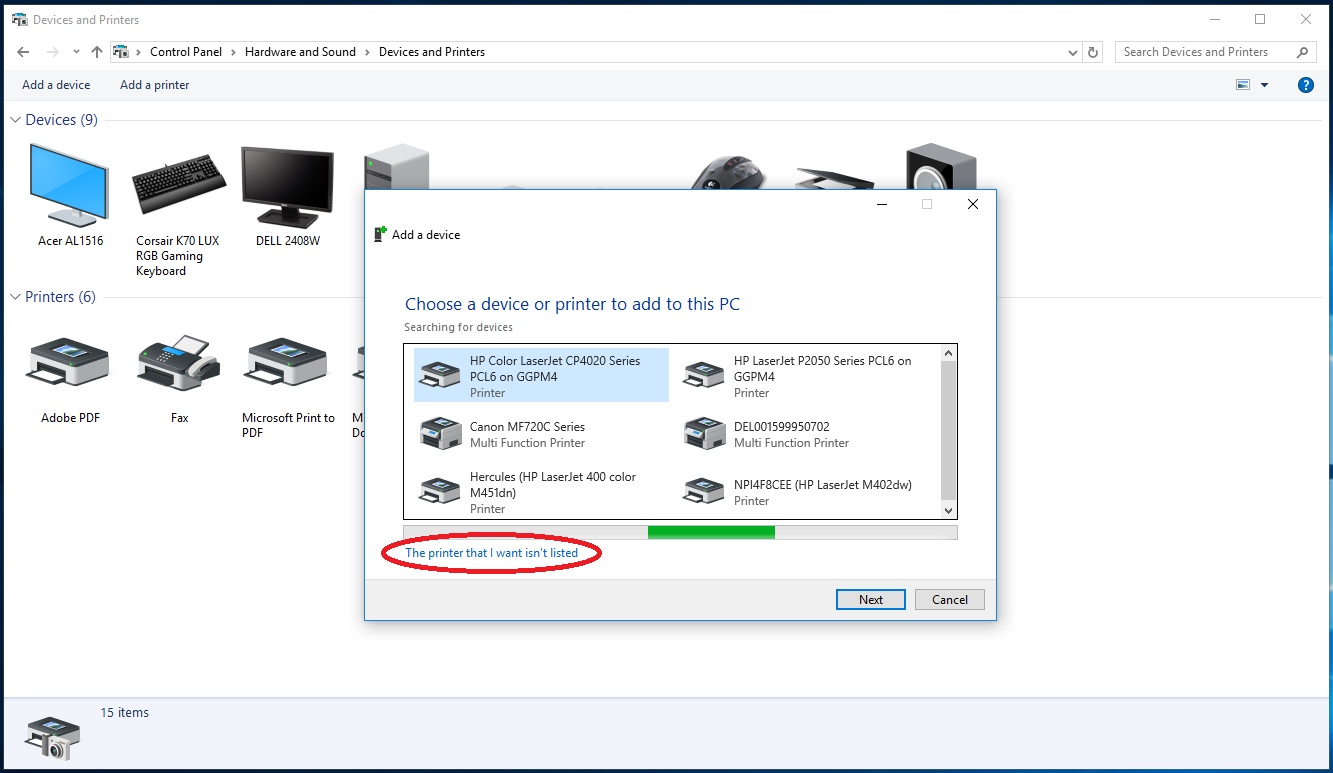
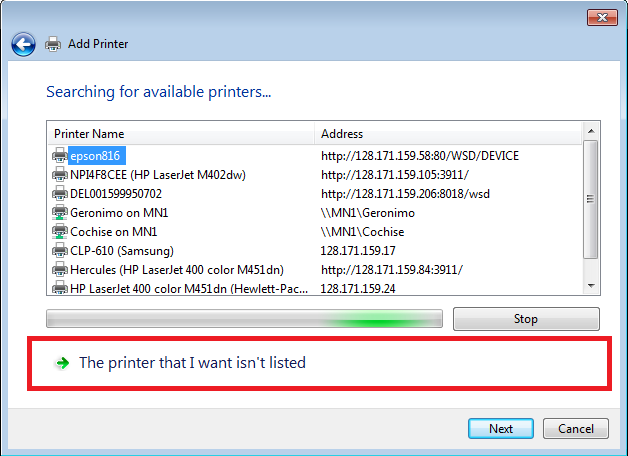
If your printer is shown in the resulting list, double click it to complete the install.
Otherwise, click "The printer that I want isn't listed."
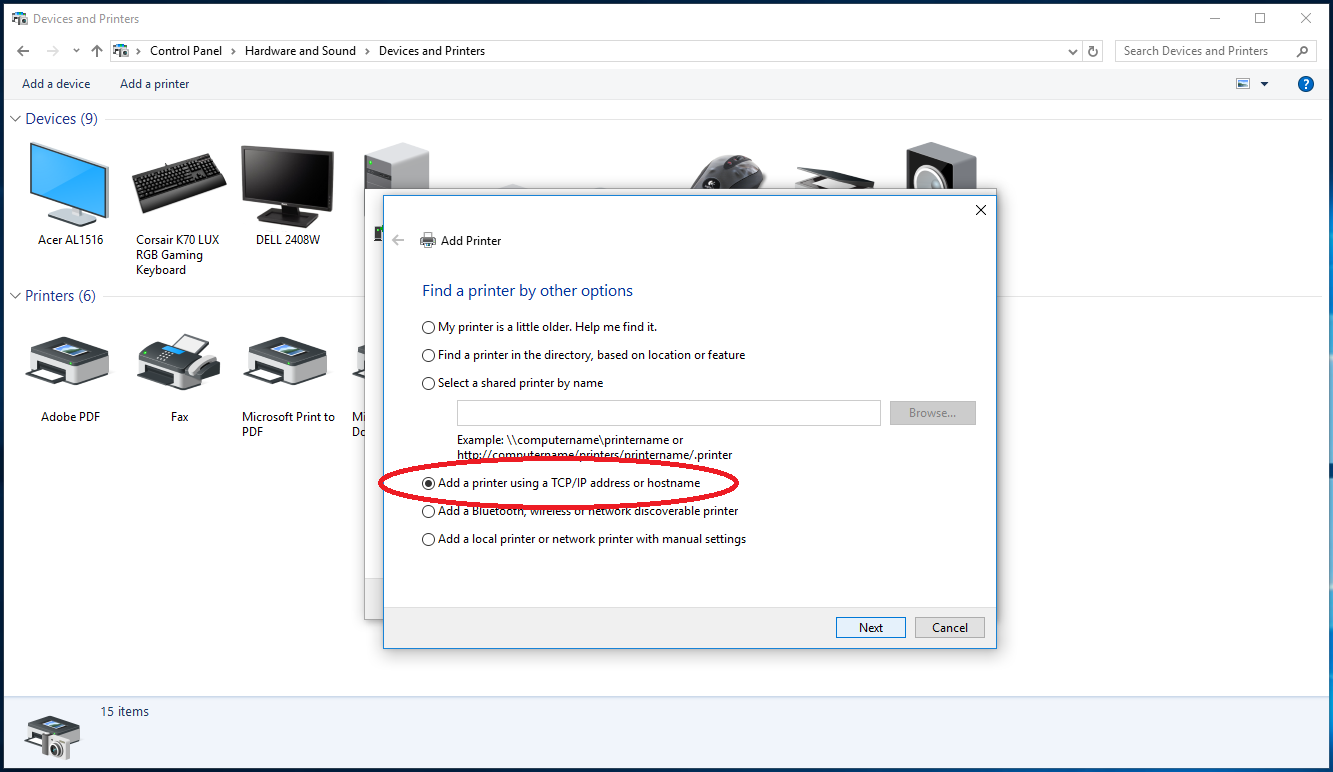
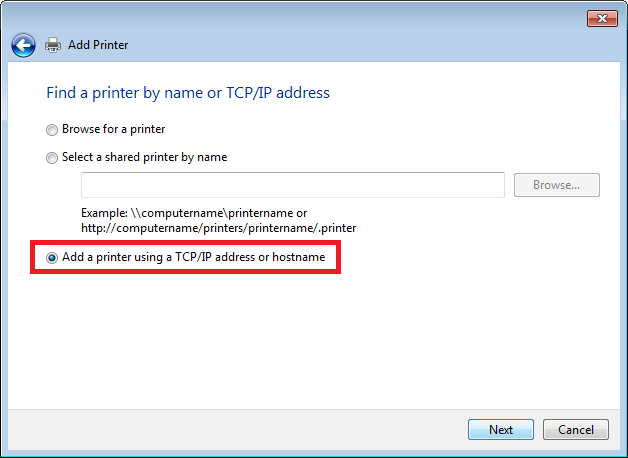
Select "Add a printer using a TCP/IP address or hostname".
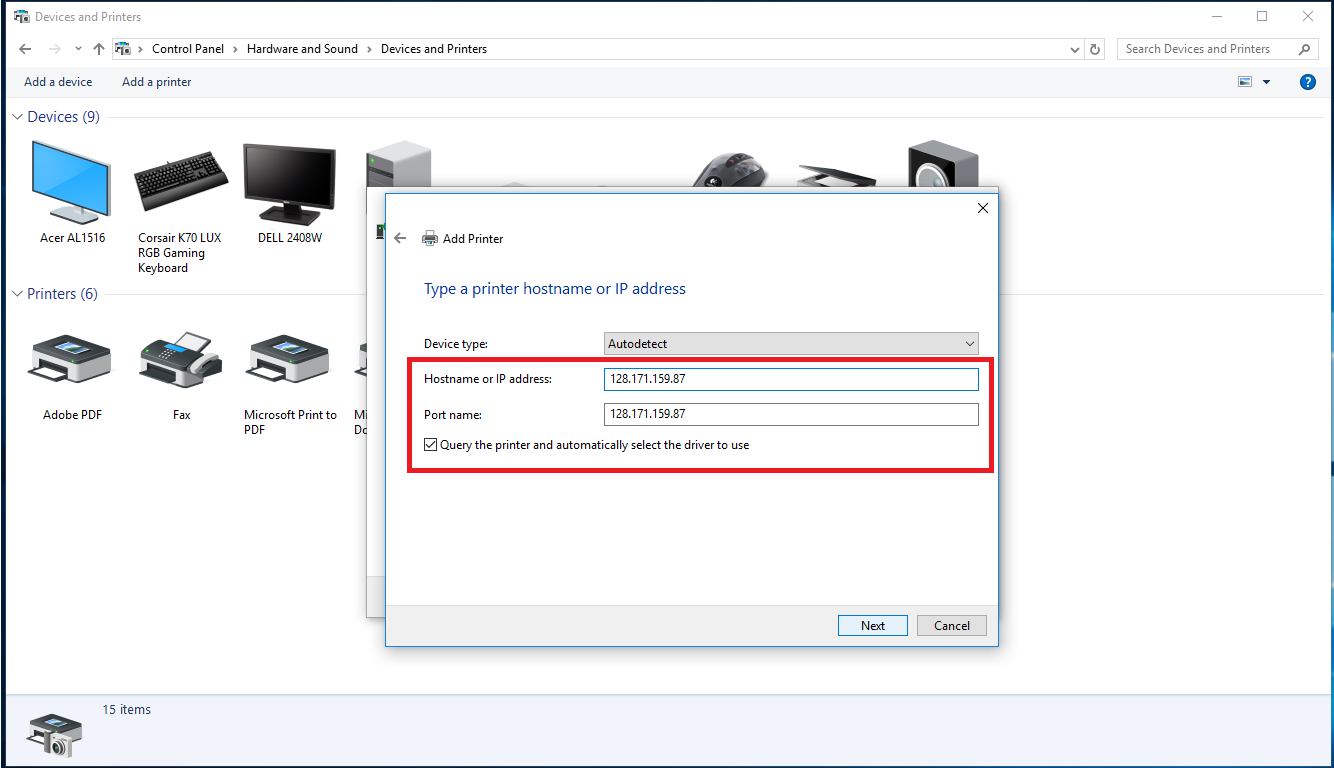
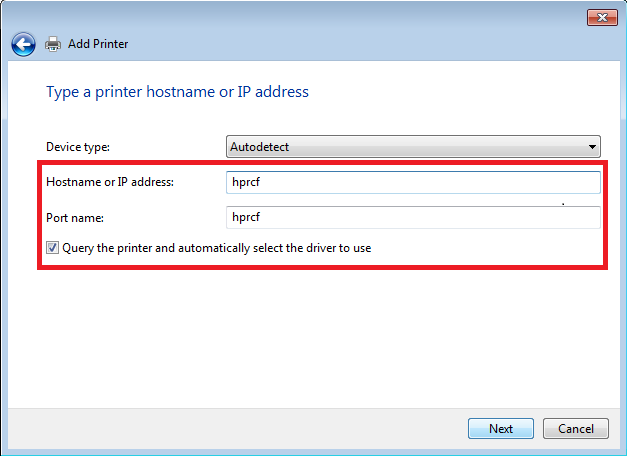
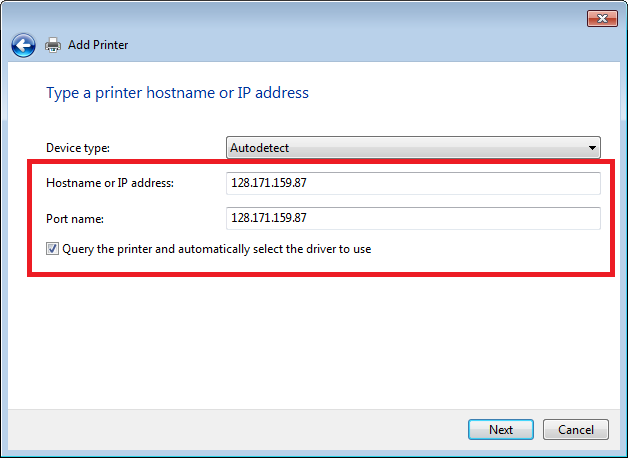
Type in the printer name or IP address in "Hostname or IP address:". The "Port name:" box should autofill, so you do not need to edit it.
Check the box to "Query the printer and automatically select the driver to use" before clicking "Next".

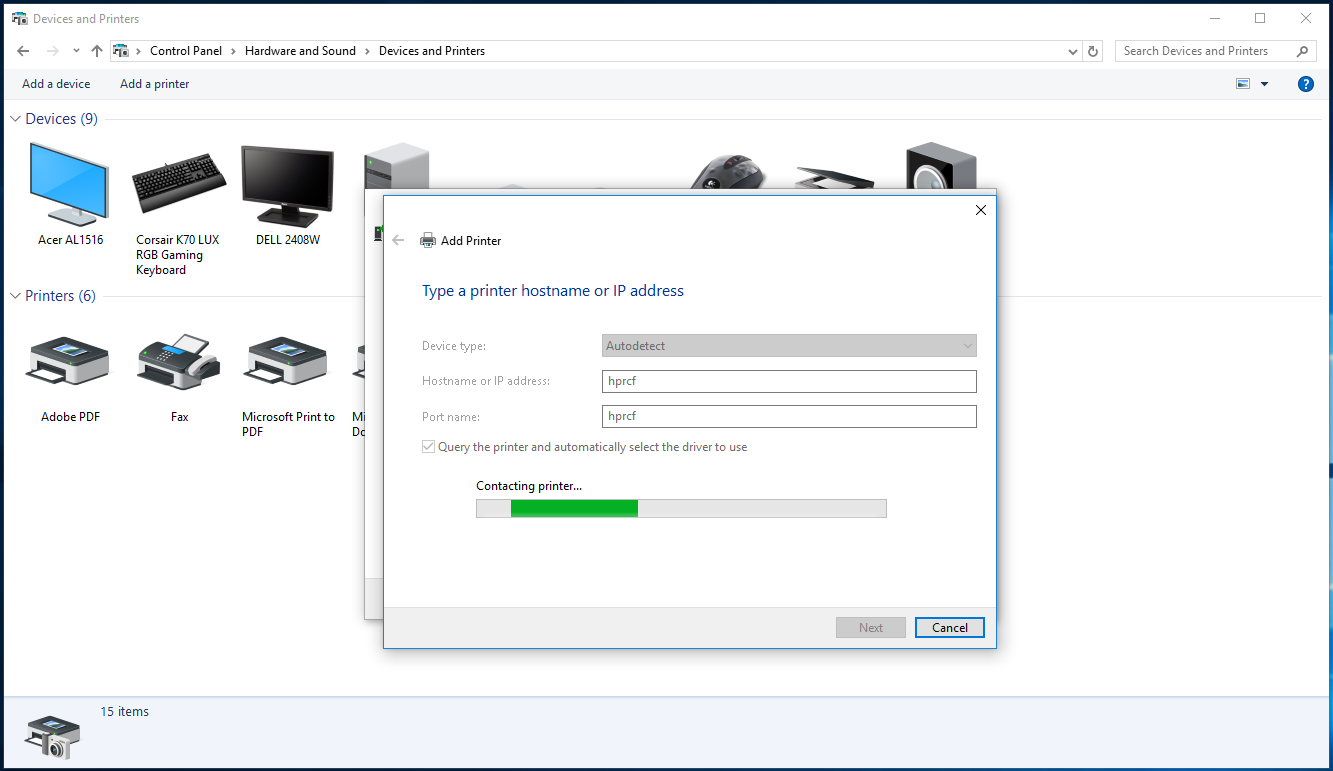
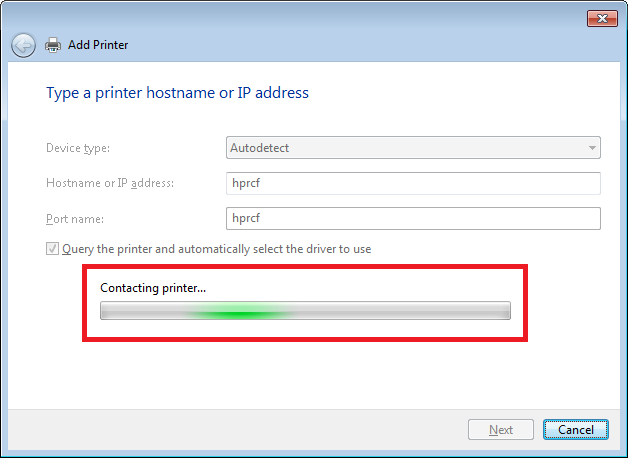
Wait for the computer to contact the printer.
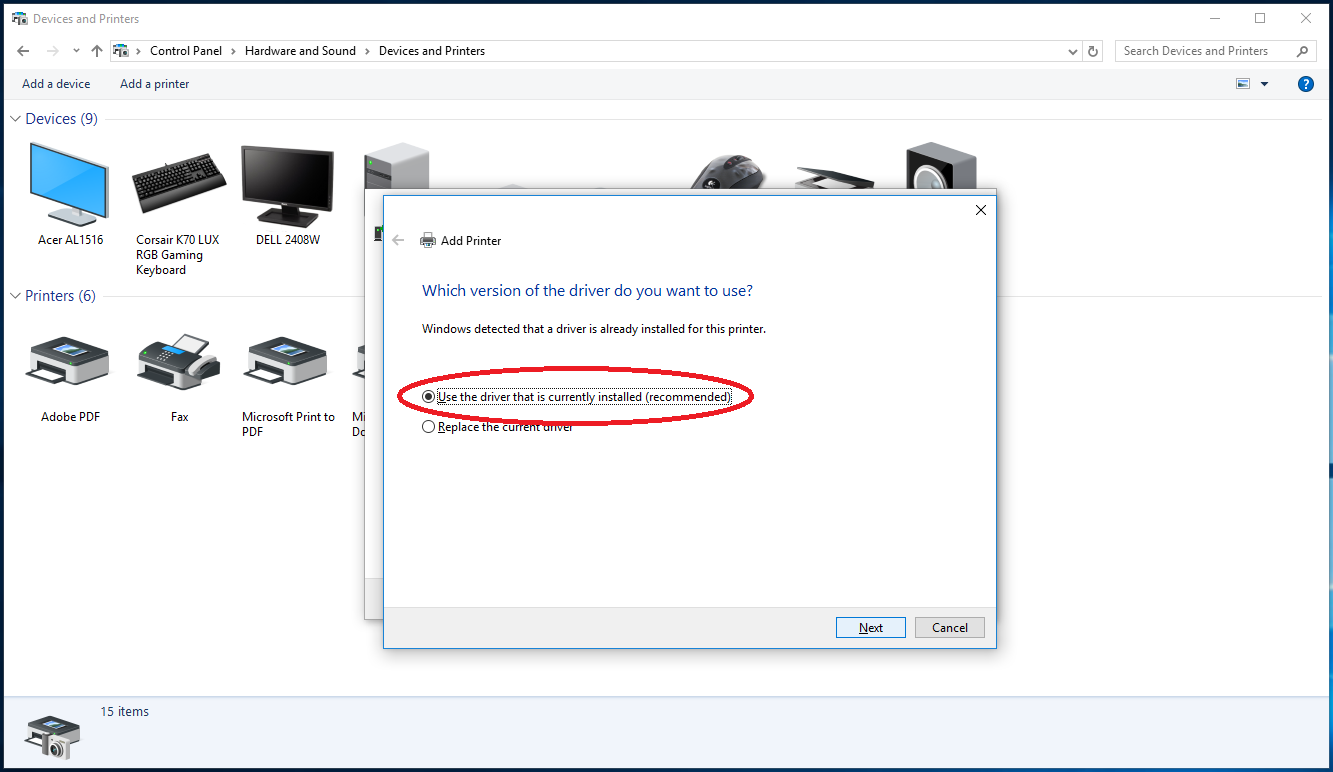
If given the option, select "Use the driver that is currently installed (recommended)."
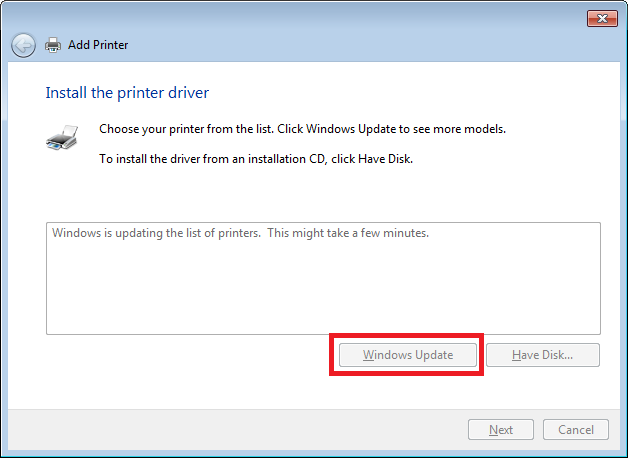
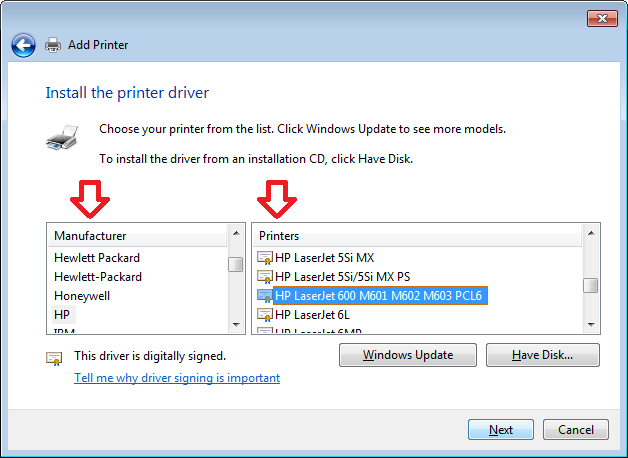
Otherwise, you will need to select the correct driver to use to contact the printer. Choose the make and model of your printer from the given list before pressing "Next". You may need to click the "Windows Update" option to see the model of your printer listed. The update will take a few minutes to finish, so be patient.
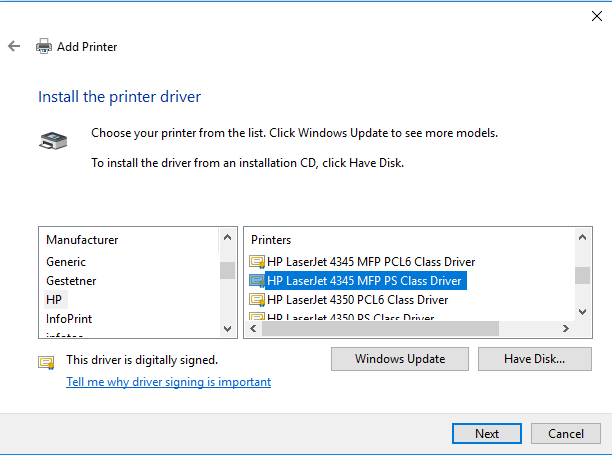
If after a few updates, the driver for your printer is still not available, download the driver online from the appropriate manufacturer. Click "Have Disk..." and select the downloaded driver in the resulting menu.
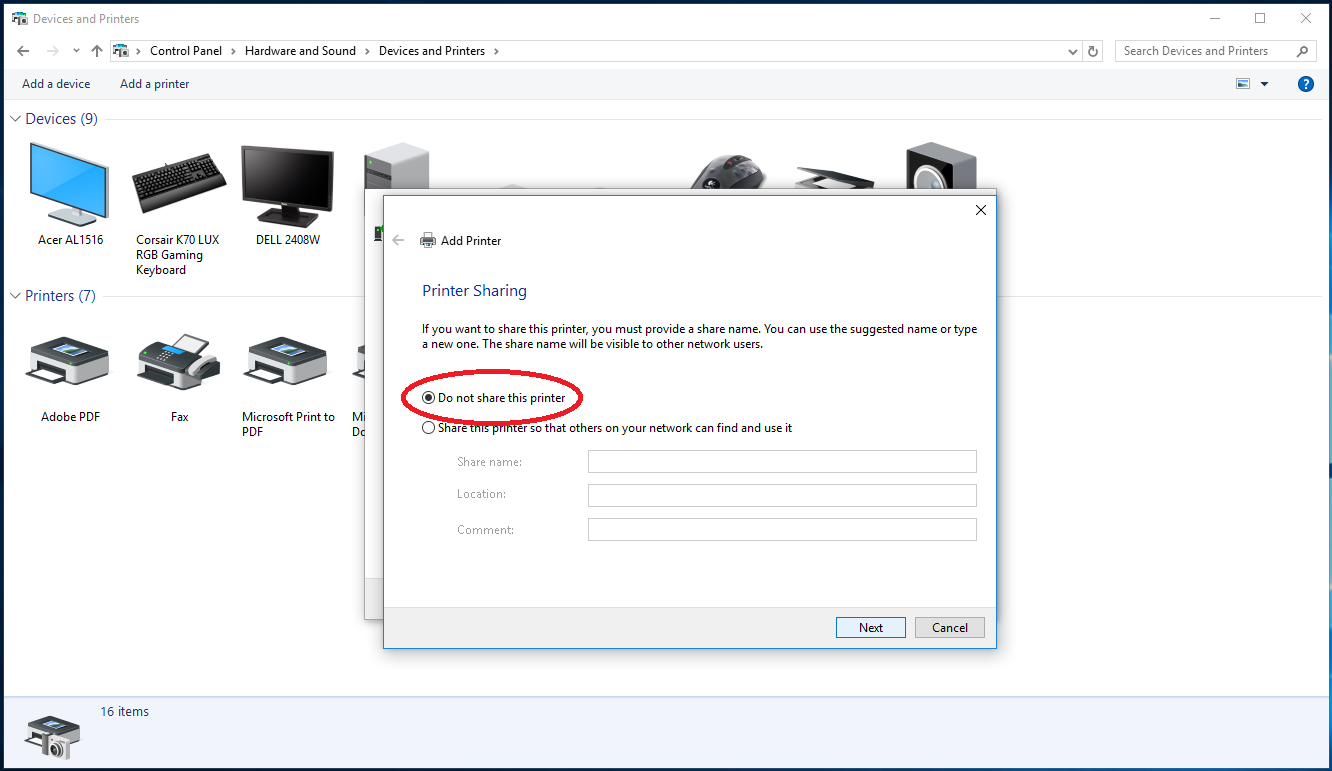
Select "Do not share this printer" then click "Next".
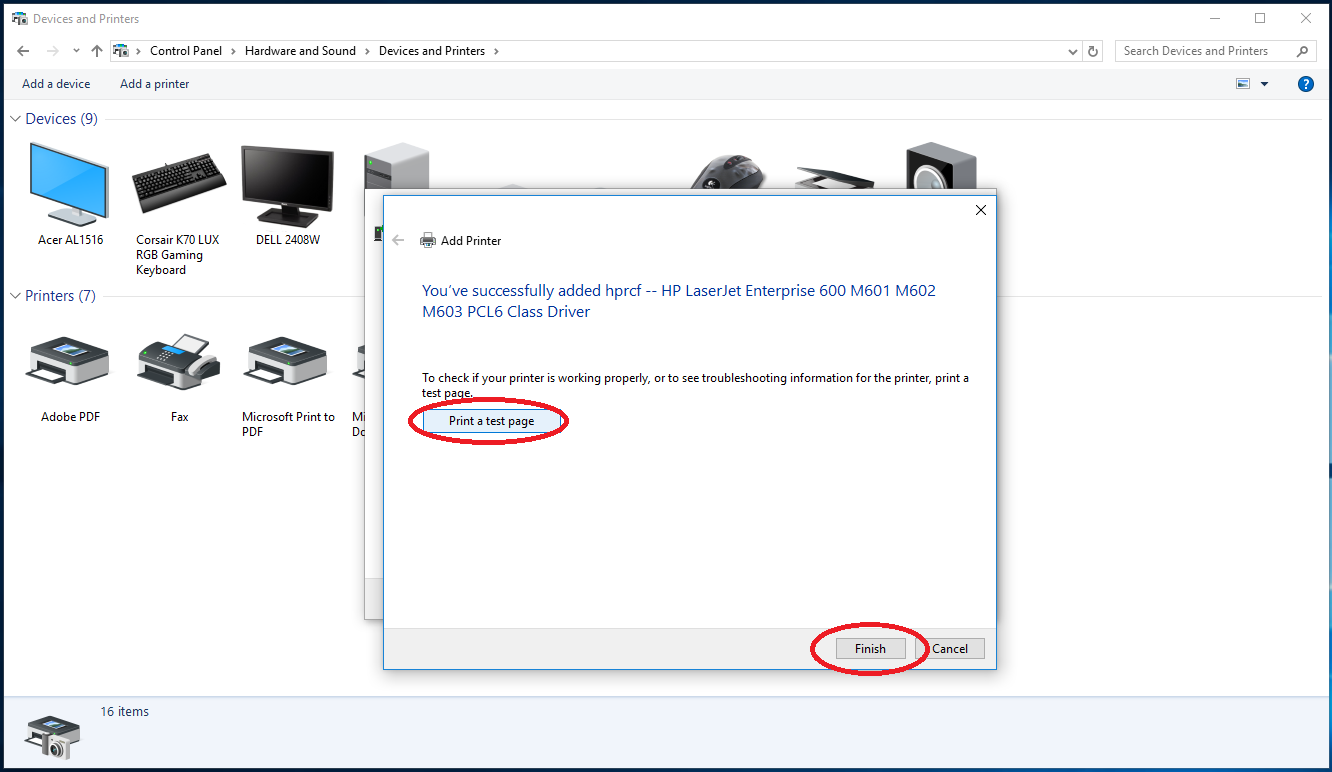
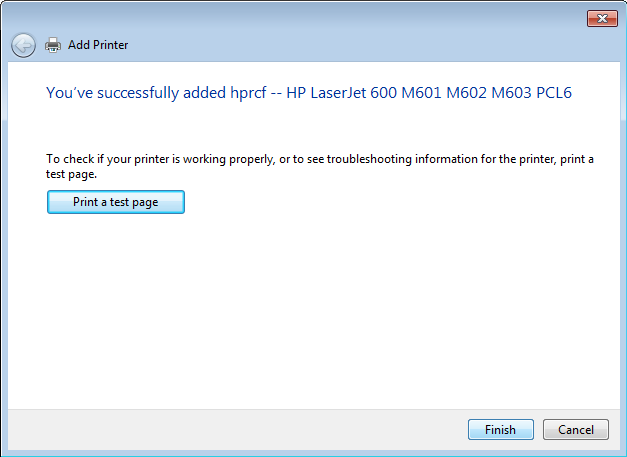
If desired, print a test page to test the connection. When finished, hit the "Finish" button in the bottom right.
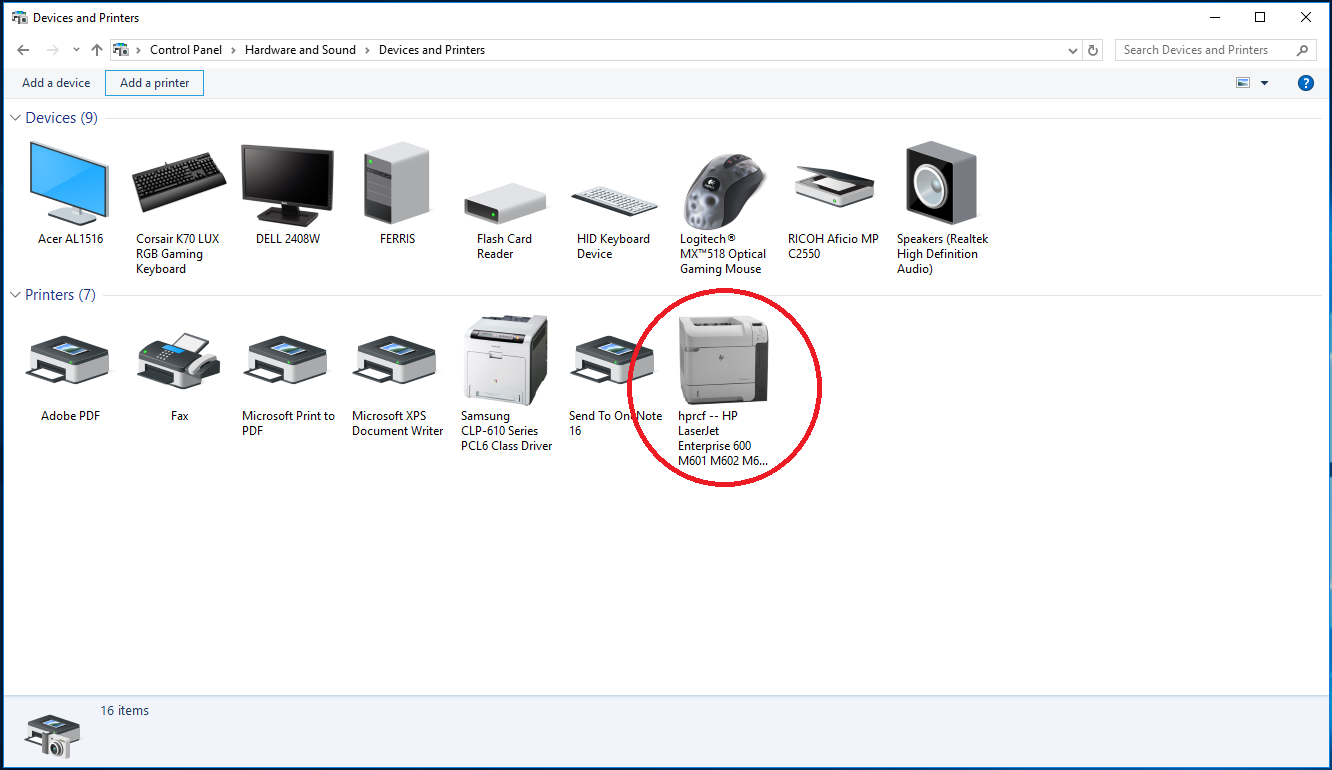
Your printer should now be visible from the Devices and Printers menu.
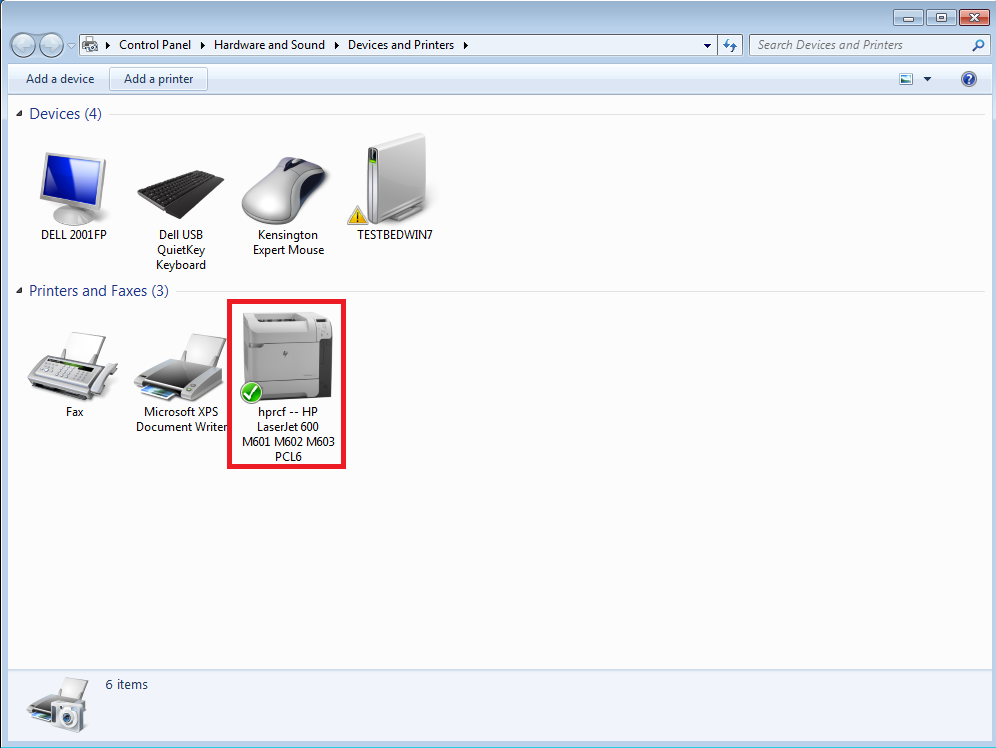
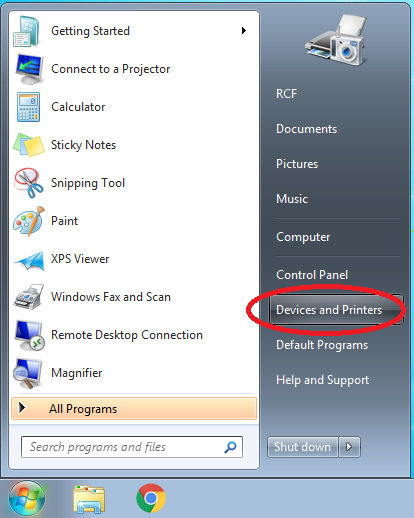
From the Start Menu, click "Devices and Printers".
Click the "Add a printer" button in the window's top menu.
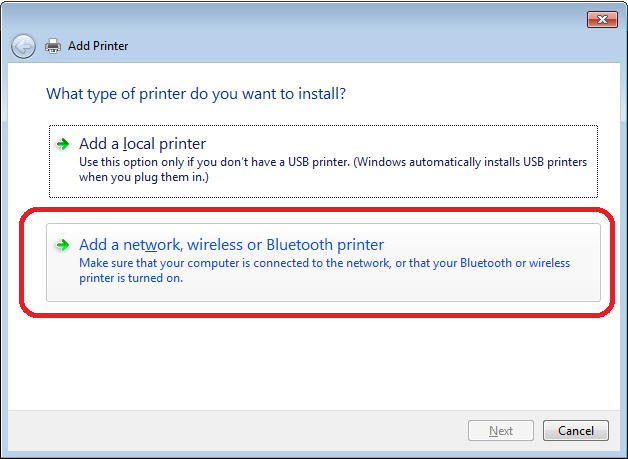
Click "Add a network, wireless or Bluetooth printer".
Click "The printer that I want isn't listed."
Select "Add a printer using a TCP/IP address or hostname".
Type in the printer name or IP address in "Hostname or IP address:". The "Port name:" box should autofill, so you do not need to edit it.
Check the box to "Query the printer and automatically select the driver to use" before clicking "Next".
Wait for the computer to contact the printer.
If given the option, select "Use the driver that is currently installed (recommended)."
Otherwise, you will need to select the correct driver to use to contact the printer. Choose the make and model of your printer from the given list before pressing "Next". You may need to click the "Windows Update" option to see your printer listed. The update will take a few minutes to finish, so be patient.
If after a few updates, the driver for your printer is still not available, download the driver online from the appropriate manufacturer. Click "Have Disk..." and select the downloaded driver in the resulting menu.
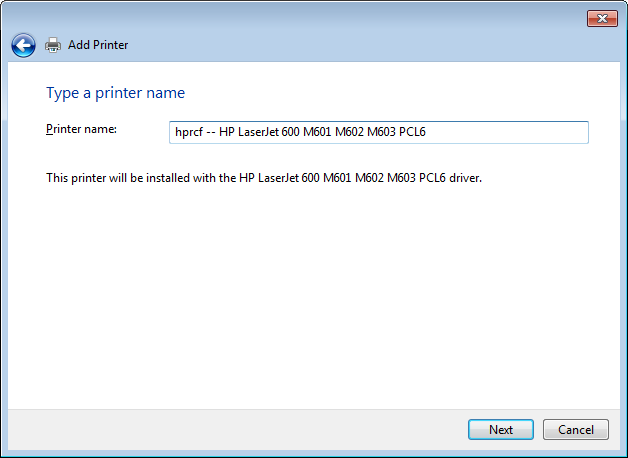
Give the printer a name that will help you remember which printer it is.
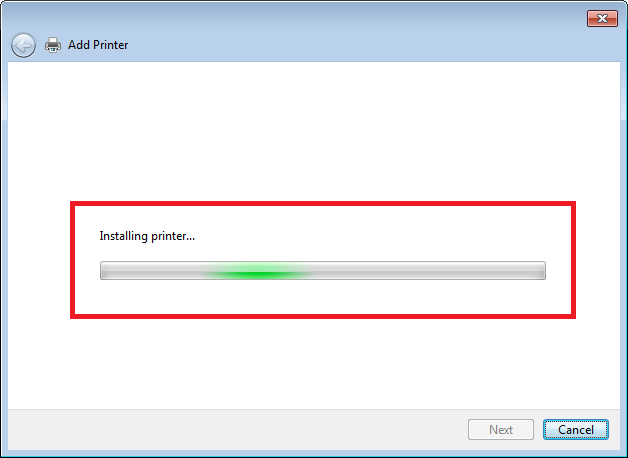
Wait for the computer to finish installing the printer.
If desired, print a test page to test the connection. When finished, hit the "Finish" button in the bottom right.
Your printer should now be visible from the Devices and Printers menu.