Note: You must have a valid SOEST network connection on your work computer and a SOEST login for this procedure to work.
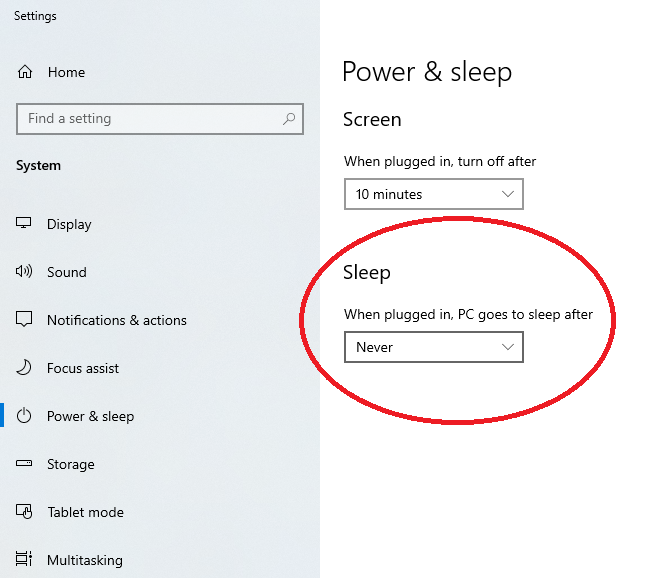
First go to your power settings and set the option When plugged in, PC goes to sleep after to Never
Go to System Properties and then the Remote tab to Allow remote connections to this computer and check the box below to Allow connections only from computers running Remote Desktop with Network Level Authentication and hit Apply
By default the current user already has access but if others need to be added, add them in Select Users...

Go to Windows Defender Firewall with Advanced Security
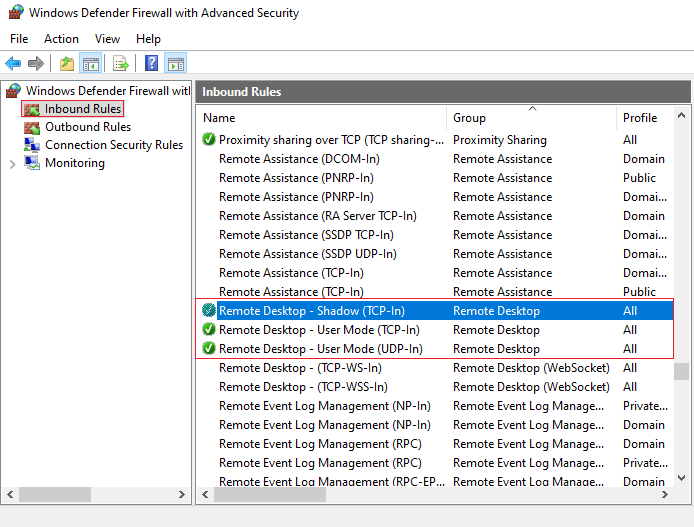
Go to Inbound rules and find the Remote Desktop rules
Right click each rule and do the following:
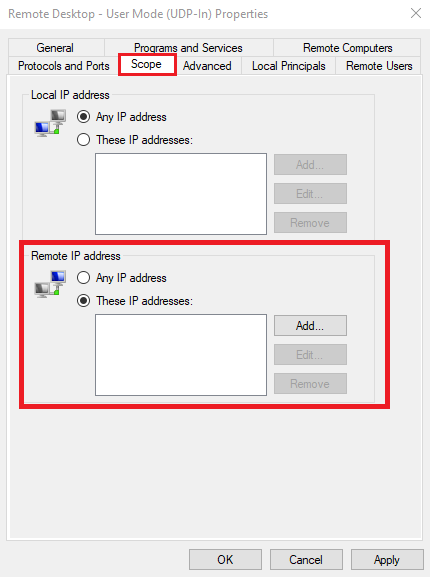
Go to the Scope tab and check These IP addresses: and then Add...
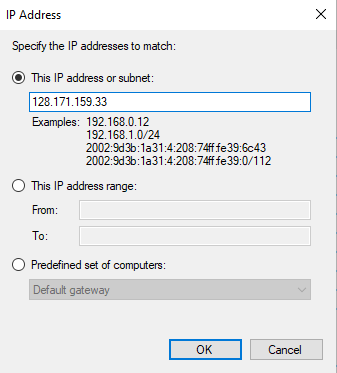
Enter 128.171.159.33 and then hit OK
Hit Apply and make sure to do the same to the other RDP rules.
Next go to Services and right-click the service called Remote Desktop Services and go to Properties.

In properties, change the startup type from Manual to Automatic.
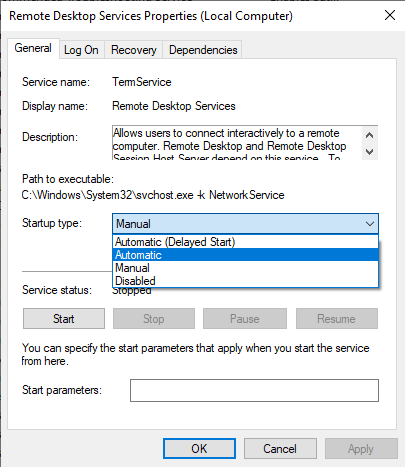
Hit Apply and then close the window.
Note: If you are not using your SOEST account to login to Windows, you will need to provide RCF the username of the account you're using to get access and we recommend changing the password to match your SOEST password.
When you're finished, contact RCF to allow the computer.
When the setup is complete, you may try to connect via portal.soest.hawaii.edu